Tuesday Tips - Types Of Shots (And What They Say.) Part 1 Camera Angles And Proximity Really Do Convey
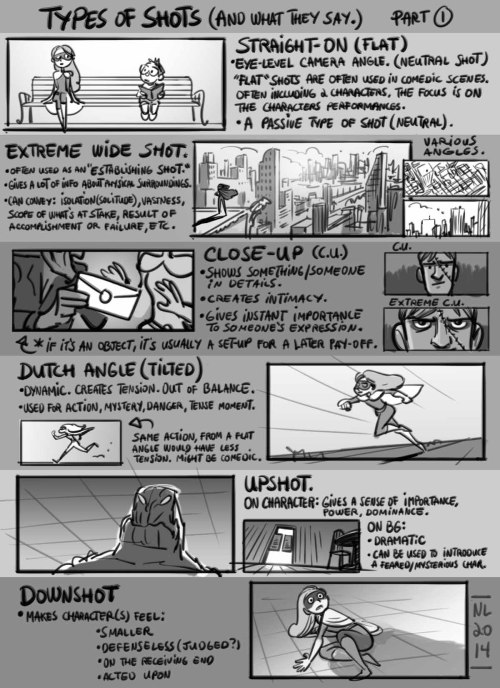
Tuesday Tips - Types of Shots (And What they Say.) Part 1 Camera angles and proximity really do convey a lot of information to your audience. Knowingly or unknowingly, your choices affect the viewers. What do you want them to feel or think at a specific moment? Norm
More Posts from Arttuti and Others
why you should make a webcomic and why you can make a webcomic
why should you make a webcomic?
it’s regular drawing practice
you get to draw and develop the universe your OCs live in
you could draw your OCs making out with context
see number 3
how can you make a webcomic?
make a new tumblr
install this theme https://www.tumblr.com/theme/37061
post comics as you would on any other tumblr they show up on their own webcomic site
what if nobody sees my webcomic :(
too bad you got to draw your OCs making out and nobody can appreciate your artistic genius obviously the world is not ready for this webcomic genius
do you by any chance have any art tips for how to connect arms/legs to the torso? It's something I've never seemed to be able to grasp and whenever I try it it looks a little forced and the movement doesn't flow and my art turns out a bit repetitive when it's just a bunch of head shots haha
It’s probably best to study a bit of anatomy! For arms at the very least you should be aware of the deltoid and pecs which will move with the arm

Leg muscles go all the way up to your pelvis and there’s a good number of them so it’s easier to group everything into sections. The section between the torso and thigh I guess kinda connect the two together from an artistic standpoint. Basically a GIANT COMMA starting from yer butt and wrapping around to your groin haha. When you move your leg you’ll likely see a crease following that shape

Hope that helps!!
Hi! Idk if my qn got sent before (tumblr mobile yeesh) I wanted to say i really really love your blog and art style! I was wondering if you have tips to draw Dean's and Cas's hair??
REALLY LATE REPLY BUT UM Dean’s got a hair parting on either side but his hair kinda all comes out from a spot on the back of his head. Keep the sides short but flip up the hair in the front

And here’s Cas again! Recapping: part on one side and have the hair come out from the parting and flip up in front as well. He’s got a longer fringe than Dean’s

How to do “extra” facial expressions!
Drawing basic facial expressions is not the hardest. Most people can draw a sad face, a happy face, angry etc., but making more multidimensional expressions is more of a challenge. I have gotten a lot of compliments on how I draw facial expressions, (specifically “angsty ones”) telling me that they are very dramatic and well… expressive! And there are actually only a few things I think about when I draw faces that take them to the next level, so I thought i’d illustrate them all here!
SUPER IMPORTANT TIP BEFORE WE START: Look at your own face when you draw faces. Even making the face when you are drawing (you don’t even have to look at it), will give you some sense of how the face muscles pull and where things fold and stretch, because you can feel it. You are the best reference when it comes to facial expressions!
Angles
Draw the head in an angle that matches the expressions you want to make. It is not a requirement, but is going to add to the effect.

Symmetry vs asymmetry
A face is rarely symmetric. Unless the face the character is making is 100 % relaxed or even dissociating, the eyebrows, mouth and facial muscles will have different placements of their respective side. This image shows the dramatic impact asymmetry has on a face:

That’s the difference between a smile and a smirk!

The first one’s like “oh yeah?” and the second is like “oH YEAH??”
The “balloon squishing principle”
This is something I did subconsciously, and I didn’t know about until I made this tutorial. And this principle goes hand in hand with an asymmetric face. Basically, if you squish one part of the face, you need to even out the empty space by “inflating” the other part of the face so that it doesn’t appear shrunken. The picture hopefully explains it:

Teeth
Don’t forget to add the gum when the mouth is open to its full potential!

Squinting and folding
Adding folds around the eyes when a character is squinting makes a HUGE difference. It makes a smile more genuine and a growl more intimidating. Adding folds to the face in general makes your characters more lifelike and ‘visually relatable’. Like, they look human, and less plastic or fake.


and so on..
Pupils and irises
The placement of the iris and pupil in relation to the eyelids is very important! The less of the white you see, the more relaxed the character is.

And then of course eyebrows and eyes go hand in hand!


Gestures, spitting, sweating…
Adding more elements than just a face is key to making the character actually look like they are feeling what you want them to feel. Just the tiniest sweat drop adds to their anxiety, spitting adds frustration to their rage, slouching shoulders, waving hands, a double chin, extreme angles, the list goes on! Add whatever and see what kind of impact it makes! Does it do the trick? Great! Add it!
Over exaggeration!!
Remember that you can almost always exaggerate more. Don’t be afraid to do draw “too much” because you’re just experimenting. See what works and what doesn’t. What do you like to exaggerate?


Now that you know some theory, it’s time to practice!
Practicing!!
The 25 Essential Expressions (a classic! I’ve done it multiple times)

And the one I do when I’m bored:
Fill a page with circles and fill them in with different expressions. Try and exaggerate as much as you can!


This is mostly for experimenting. They are quicker to draw than complete faces, but the same rules should apply!
And that’s about it!
I don’t know if I covered everything in this tutorial, since some things might be obvious for me, and this post perhaps only scratches the surface. So feel free to send me a message if you want an explanation about something more in depth! Thank you for reading! And now DRAW!!! ✨🎨
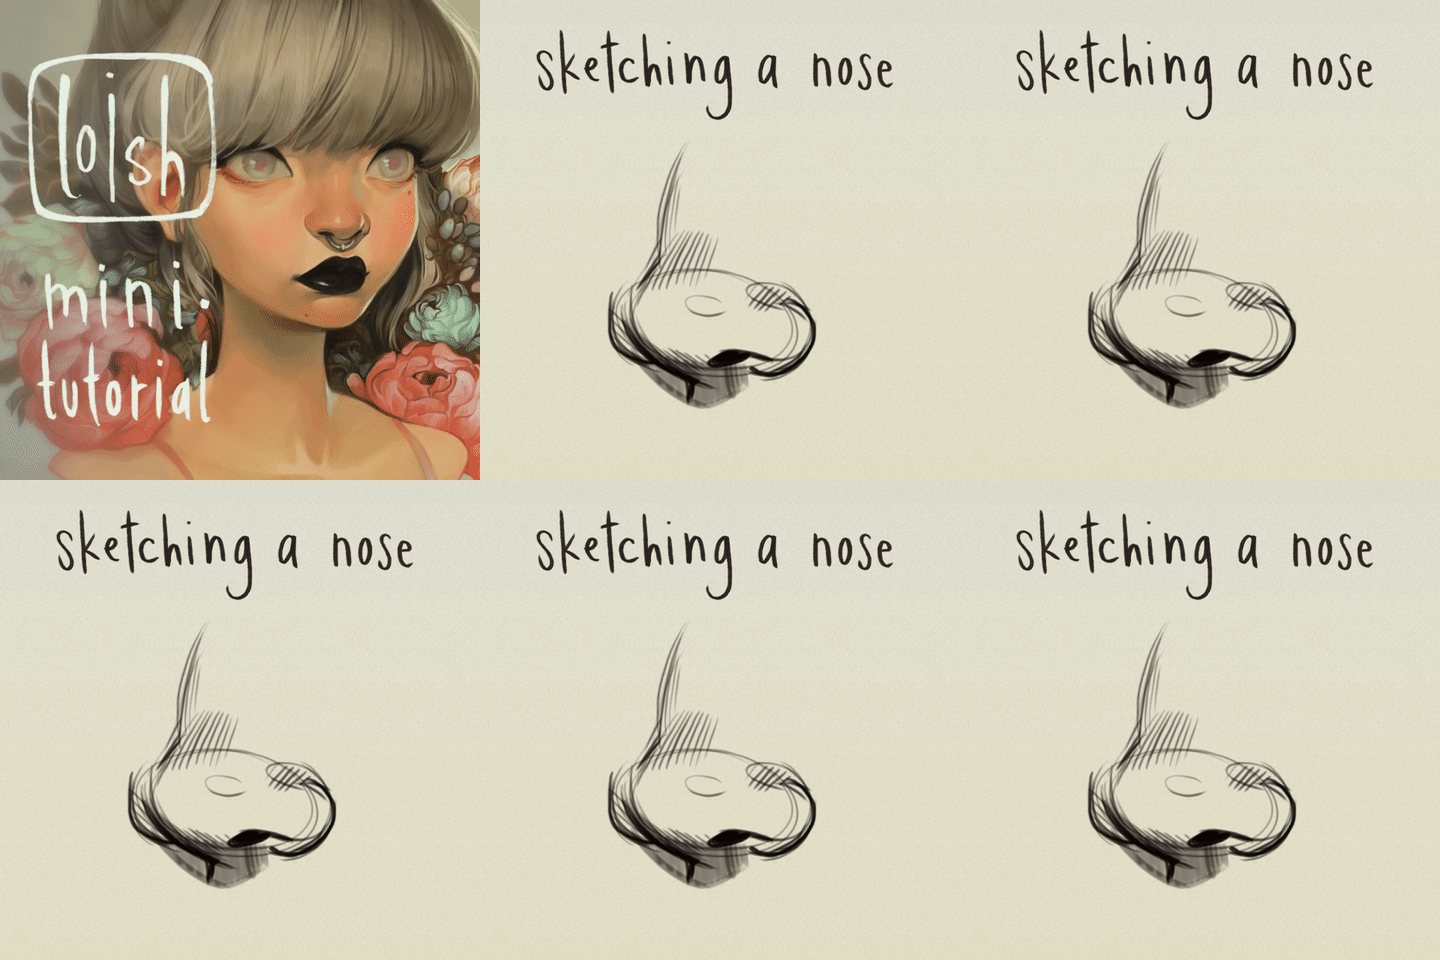
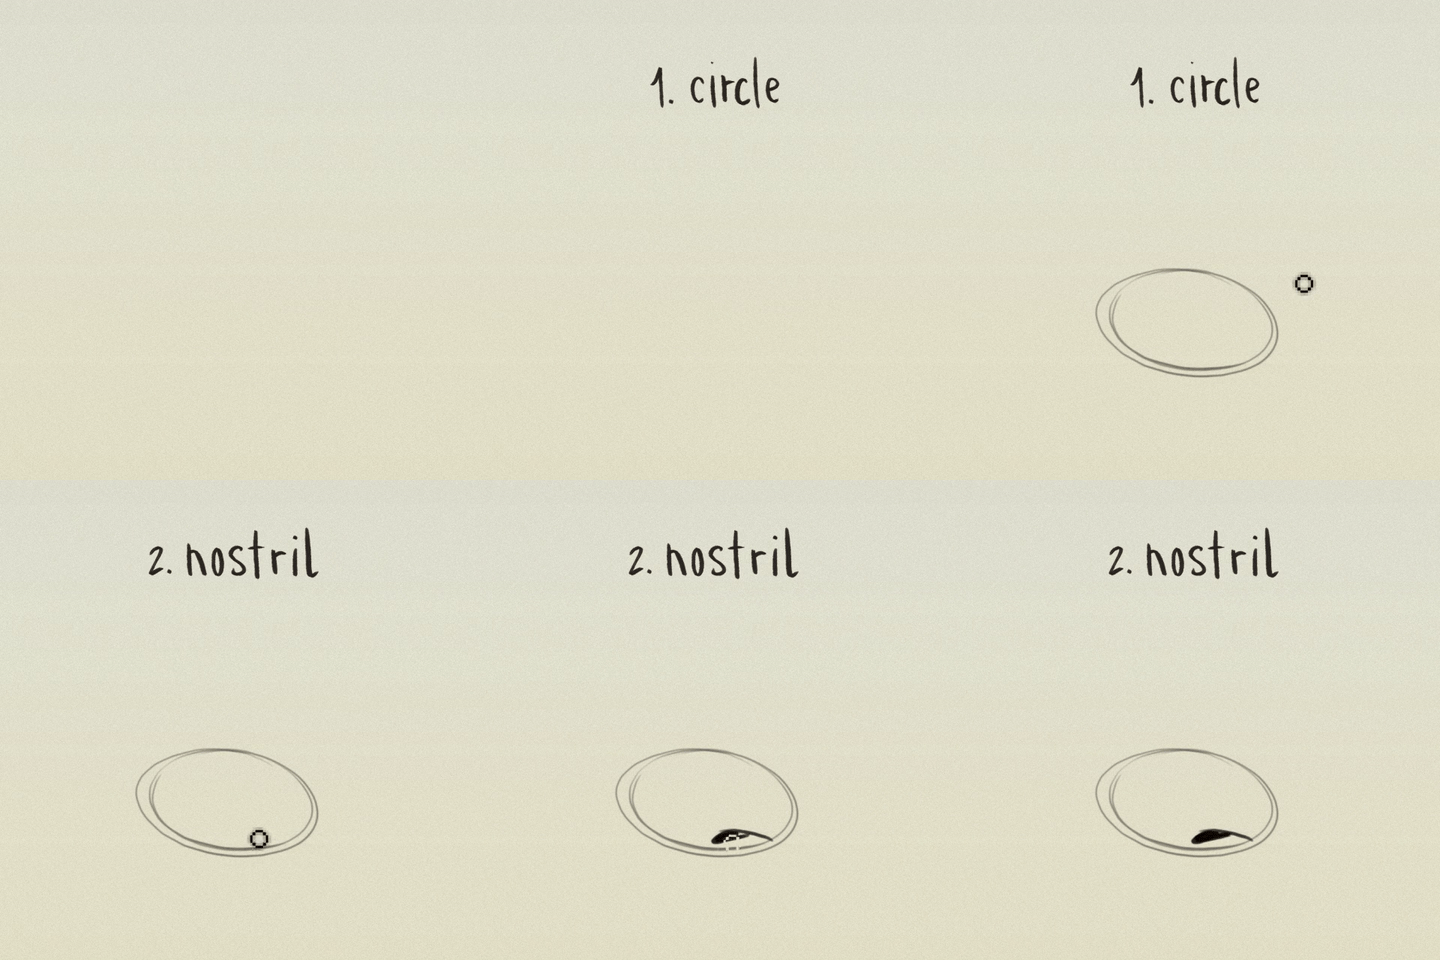
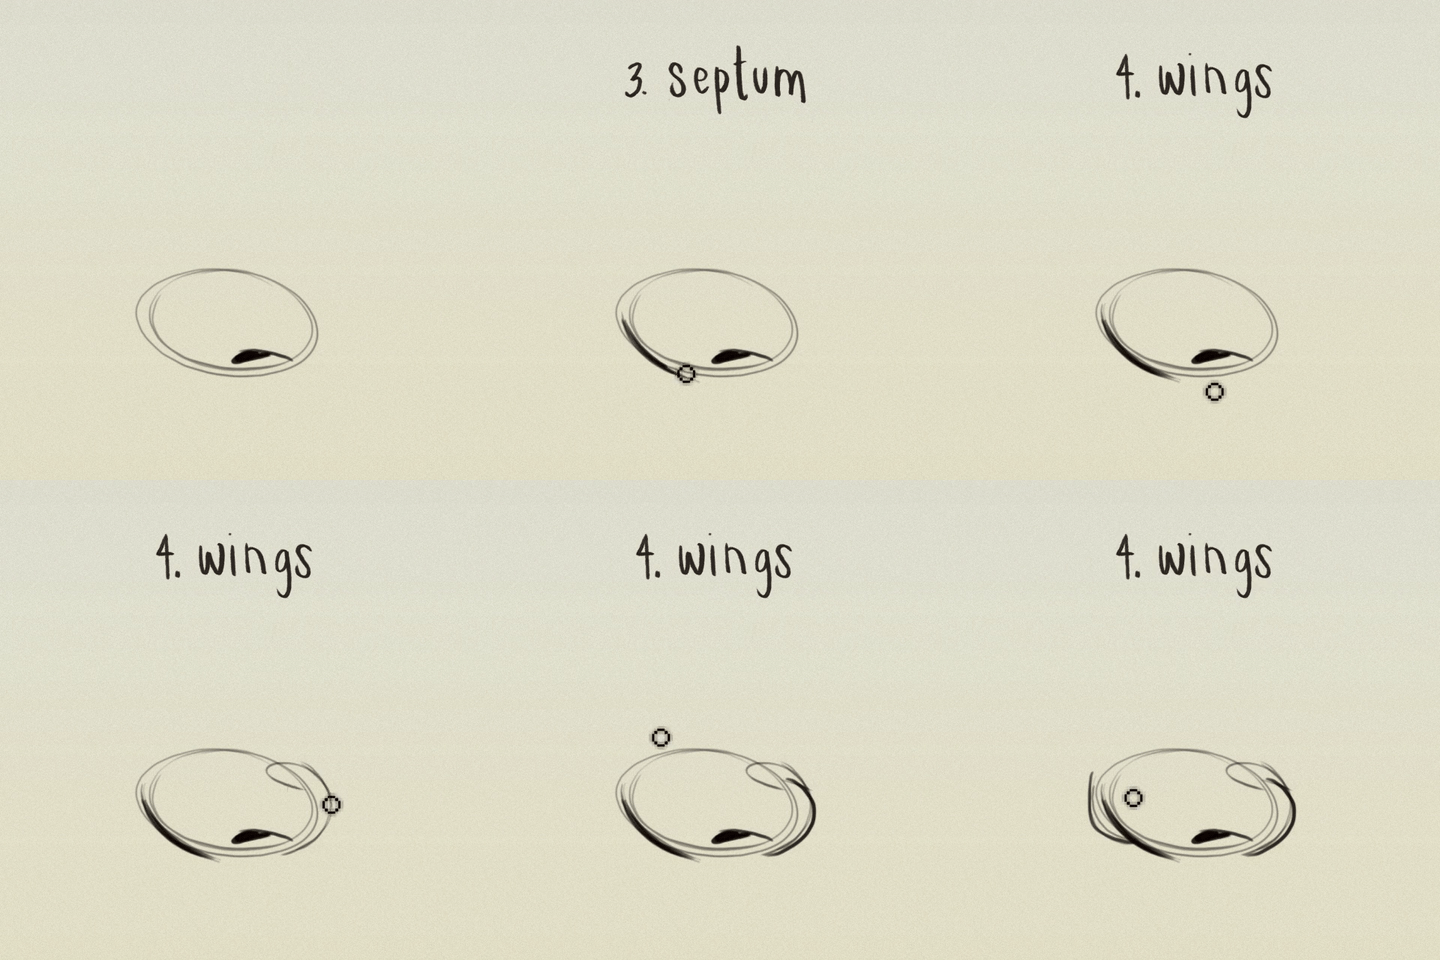
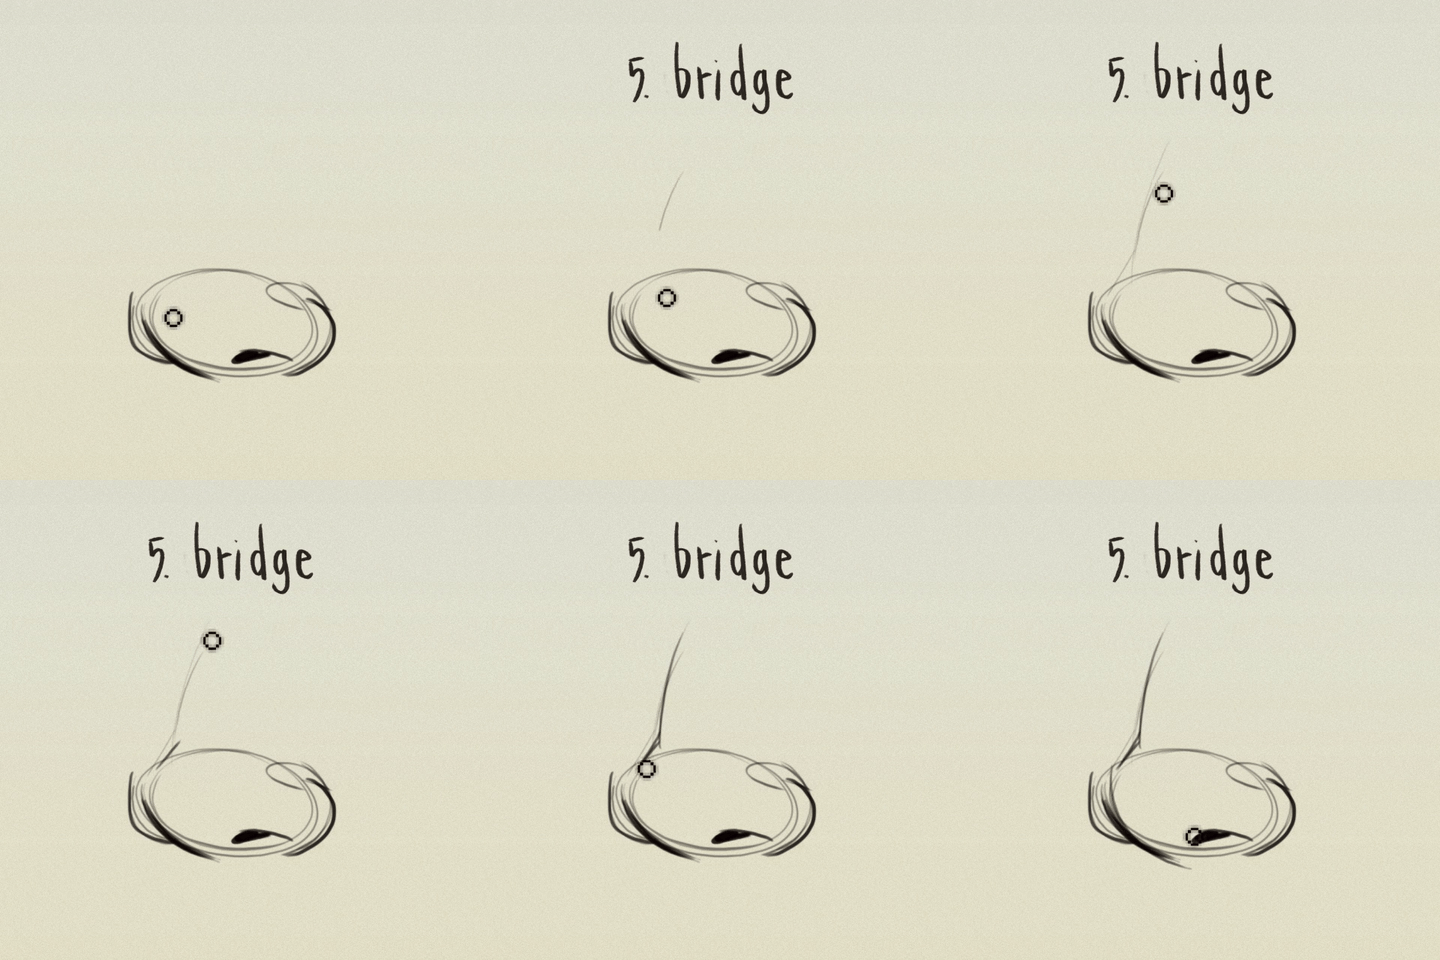
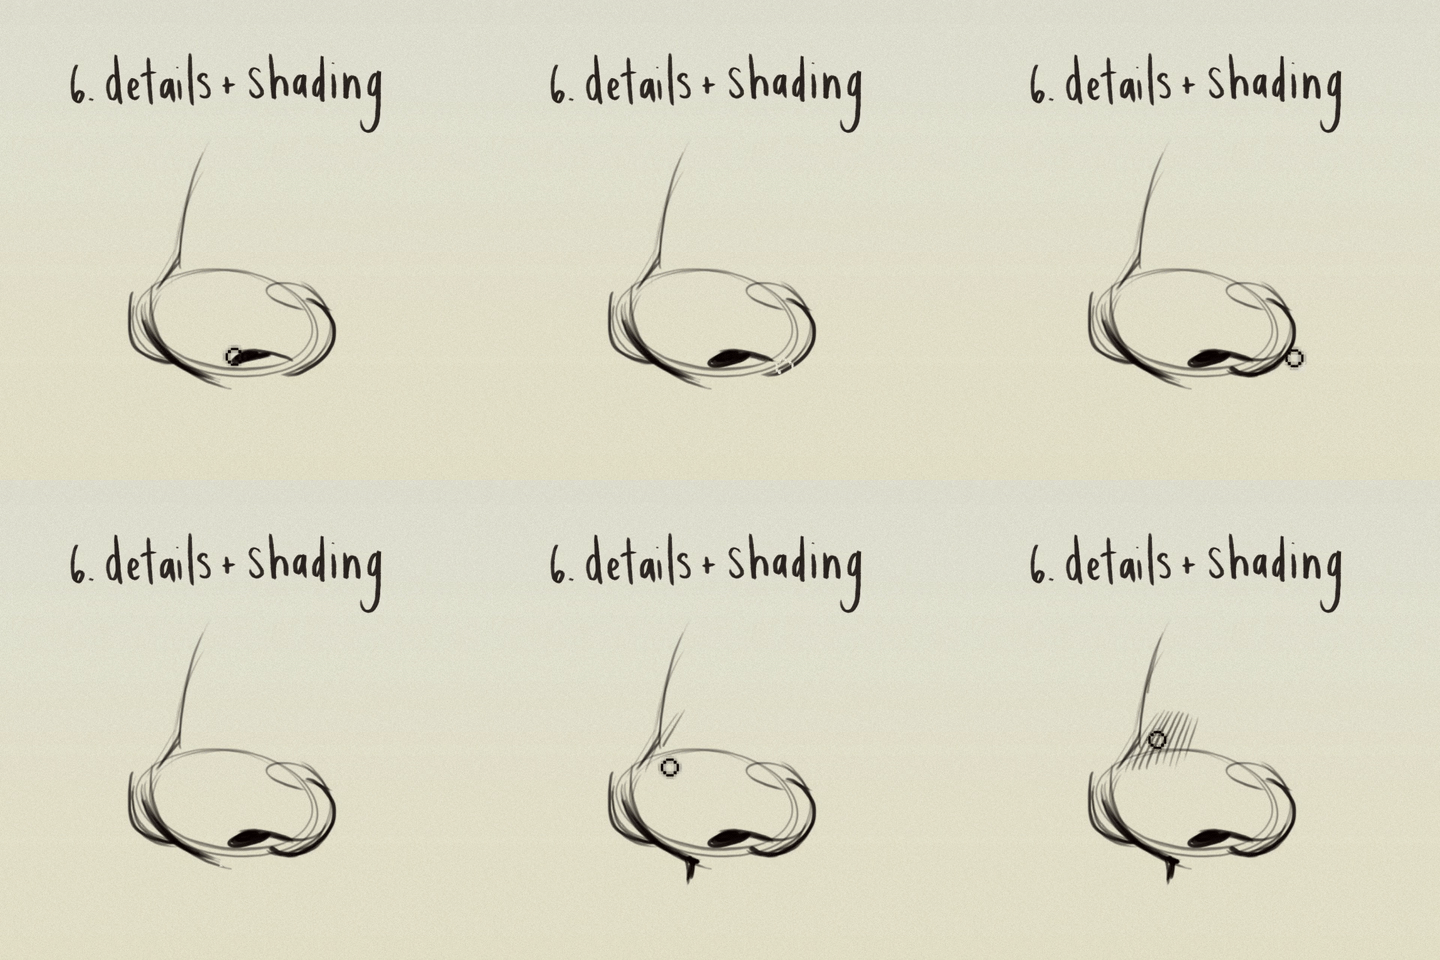

more mini tutorial gifsets :) for the video version check out https://www.instagram.com/p/BGZfej3R_OM/?taken-by=loisvb
-
 terrific-togekiss reblogged this · 1 month ago
 -
 terrific-togekiss liked this · 1 month ago
 -
 trying2write liked this · 1 month ago
 -
 gerbitwoofums liked this · 2 months ago
 -
 art-tutorials-and-refs reblogged this · 2 months ago
 -
 cannachan reblogged this · 2 months ago
 -
 ritossant reblogged this · 2 months ago
 -
 lireb-librarian liked this · 2 months ago
 -
 mercurialsims liked this · 3 months ago
 -
 wydanastasia liked this · 3 months ago
 -
 milomoony-blog liked this · 4 months ago
 -
 s4-inspo reblogged this · 5 months ago
 -
 olivesplanet liked this · 5 months ago
 -
 mistyciel liked this · 5 months ago
 -
 warrenpeace liked this · 5 months ago
 -
 snooperboopers reblogged this · 5 months ago
 -
 syonesims liked this · 6 months ago
 -
 willowgroves liked this · 6 months ago
 -
 awesometrait liked this · 6 months ago
 -
 elaienar reblogged this · 7 months ago
 -
 iamdiamandis liked this · 7 months ago
 -
 bobvincent-blog1 liked this · 7 months ago
 -
 artking-4 reblogged this · 8 months ago
 -
 spiritualstateofmind liked this · 8 months ago
 -
 twadi-gurl reblogged this · 8 months ago
 -
 clubskoo liked this · 9 months ago
 -
 ohyeahkurt liked this · 9 months ago
 -
 peridotartstuff reblogged this · 9 months ago
 -
 voidcrittr liked this · 10 months ago
 -
 helenofsimblr liked this · 11 months ago
 -
 sparkiekong liked this · 11 months ago
 -
 merrymomo reblogged this · 11 months ago
 -
 merrymomo liked this · 11 months ago
 -
 whyisthissimblrhere reblogged this · 11 months ago
 -
 fadingforrest reblogged this · 11 months ago
 -
 ethicaltreatmentofcowplants liked this · 11 months ago
 -
 headphonestar liked this · 1 year ago
 -
 yeehaugh liked this · 1 year ago
 -
 bitchiilante liked this · 1 year ago
 -
 milecoisas liked this · 1 year ago
 -
 bonneblah liked this · 1 year ago
 -
 mcattacksims liked this · 1 year ago
 -
 gravityvalley liked this · 1 year ago
 -
 blueyjoy liked this · 1 year ago


