Brooke & Lauren By Jenna Bascom Event And Editorial Photography, Seen On Gay Weddings


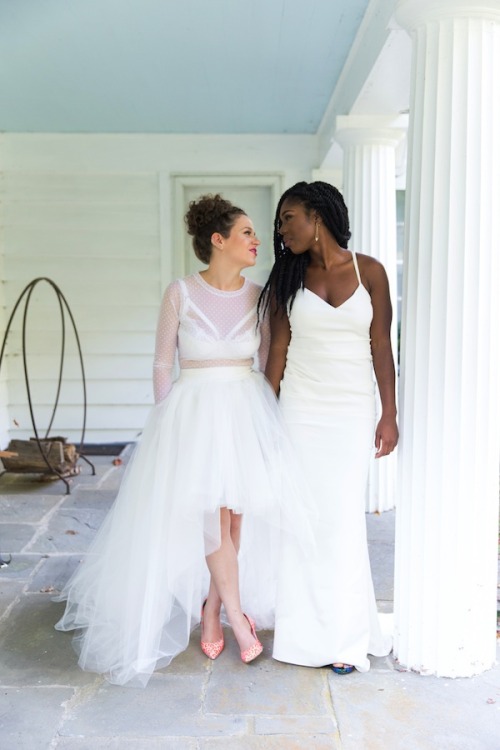
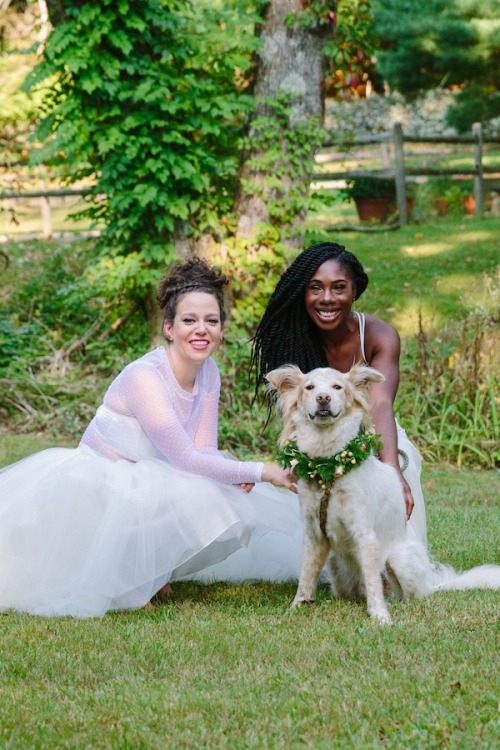


Brooke & Lauren by Jenna Bascom Event and Editorial Photography, seen on Gay Weddings
More Posts from Moola-of-hula and Others
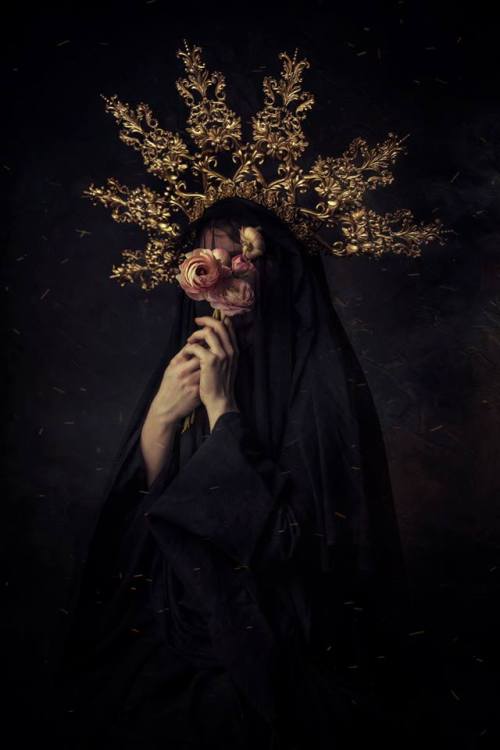
Discreet yet baroque: I love the mixed mood of this capture by @studio.sheridansart showcasing wearable art by Pioro Blue… . . . #beautifulbizarremagazine #fineartphotography #photography #wearableart #headdress #laurasheridan #pioroblue
so how bout that interview huh


A User’s Guide To The Brain
More about the human brain and behaviour on @tobeagenius


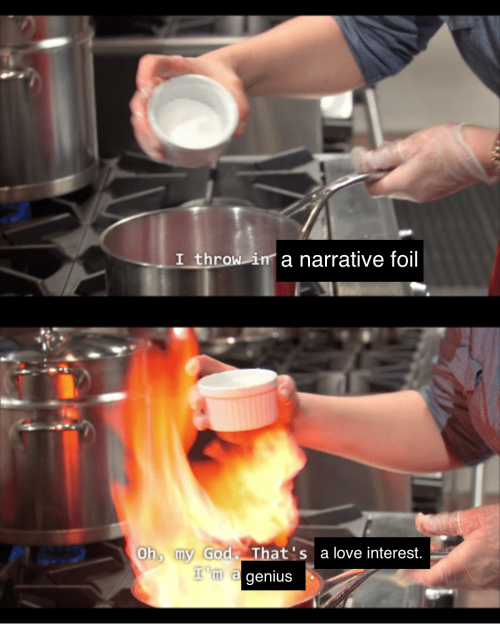
When my daughter asks me why I named her Rhony I’ll just show her this video


@danielledesireexoxo
Medical School Interviews
Across the UK hopeful medics will have sent off their applications and are eagerly awaiting for an interview. Considering I was in the same position a literal year ago I thought I would share some advice for the interviews. Unfortunately, I can’t disclose what interview questions I got but I can give some general tips that really helped me.
First, I thought I would give some background to my application. I applied to 4 medical schools that were all MMI so the advice I am about to give is more geared towards MMI style interviews. I was very fortunate to get 3 interviews and 3 offers for medicine.
Look at the Medical Schools website. Each medical school tends to outline the qualities they are looking for at interview on their website. Think of specific examples for each quality and practice how you have used/developed said quality and why this would make you a good doctor.
Stay away from Student Room. The number of people that told me to stay away from student room was enormous and yet I still ignored them and checked. All it does is scare you and makes you panic. It’s not worth the stress at all. Just focus on your application and nobody else’s.
Be professional. Medical schools really value professionalism and teach it throughout medical school. However, there is the expectation for you to have a certain level of professionalism before you enter medical school. Little things such as what you wear can make a big impact. For example, guys tended to wear suits at the interview however it isn’t necessary to as long as you are dressed smart then it is okay. Arrive on time. It looks really bad if you arrive late to your interview and you will also probably be really stressed as well which won’t help at all. If you are going to be late ring the medical school well in advance.
Some interviewers may be mean. I wish someone had told me this. Interviewers are there to test certain skills and therefore may be appear to be really brutal to you. Remember, that is what they are there for, stay calm and prove to them that you can handle it. This is essential as not every patient is going to be compliant and they need to test that you are able to cope with it.
Stay up to date with the news. When I had my interviews, the junior doctor contract was very hot in the news so I read around the topic. However, medical schools expect that of you and will probably not test you about that as it doesn’t really show anything that makes you stand out. But keeping up to date with scientific advancements in the medical field will put you in good stead.
Be honest. I think this is probably the most important tip I have. If you do not know something, then tell them that you don’t know it. The person asking will probably have a lot of expertise on the subject and will be able to tell when you are waffling. A lot of the time they are trying to see if you are brave enough to say you do not know rather than seeing if you actually do know something on that topic. Remember that a responsible doctor is one that stays within their limits and admits that they do not know something. If you are quite competent on the subject, then do talk about it however do not feel pressured to have a conversation with them about it.
So there are all my general tips! I just want to finish with saying that please don’t worry if you mess up a station. MMIs typically have 7/8 stations, you are judged on all the stations not just one, so take a deep breath and smash the other ones. If anyone has any questions regarding interviews just send me a message.
Good luck to everyone applying!
(anon bc I'm a nerd) but would you recommend any books? 😆 I'm trying to get back into reading and it would be greatly appreciated 💞 love your blog!
AAAAAAA MY FAVORITE KINDS OF ASKS ARE BOOK REC ASKS YES I CAN REC U SOME BOOKS
fantasy/sci fi/magical realsim etc
mistborn trilogy by brandon sanderson
a darker shade of magic by v.e. schwab ★
the archived by victoria schwab
this savage song by victoria schwab
vicious by v.e. schwab
more than this by patrick ness ★
the rest of us just live here by patrick ness ★
an ember in the ashes by sabaa tahir
peter darling by austin chant ★
illuminae by jay kristoff and amie kaufman
the strange and beautiful sorrows of ava lavender by elizabeth wein ☆
of fire and stars by audrey coulthurst ★
the winner’s trilogy by marie rutkoski ☆
ink and bone by rachel caine ★
we are the ants by shaun david hutchinson ★
timekeeper by tara sim ★
the diviners by libba bray ★
the night circus by erin morgenstern
contemporary
i’ll give you the sun by jandy nelson ★
to all the boys i’ve loved before by jenny han ☆
we are okay by nina lacour ★
if i was your girl by meredith russo ★
you know me well by nina lacour and david levithan ★
the sky is everywhere by jandy nelson
this song is (not) for you by laura nowlin★
if he had been with me by laura nowlin
(★=lgbtq+ representation☆= very minor lgbtq+ representation)
i hope this helped!!!
Need to make

8-foot giant squid pillow.
You’ll need:
2 yards of felt
1 yard of patterned fabric (I suggest a polka dot-type pattern so it looks like suction cups)
1 medium piece of black felt, 1 medium piece of white felt (for the eyes)
white thread, black thread and thread of the same color as the felt you’re using
pins
about 5 lbs. of stuffing
a couple big sheets of paper to draw your pattern
First, you need to draw out your patterns. Here’s a basic template to get you started, although most of the measurements are reasonably fudgeable. If in the likely event you don’t have any four-foot-long pieces of paper lying around, just tape a few pieces together.

Once you’ve drawn out your eight patterns, it’s time to cut the fabric. Pin the pattern to the fabric, laid flat, and cut out the following, leaving a half an inch or so of extra fabric around the edge of the pattern:
FOR THE ARMS: 8 felt and 8 fabric cutouts of piece 1
FOR THE, UH, LONGER ARMS: 2 felt and 2 fabric cutouts of piece 2
FOR THE BODY: 2 felt cutouts of piece 3
FOR THE FIN: 4 felt cutouts of piece 4
FOR THE HEAD: 1 felt cutouts of piece 6
FOR THE EYES: 2 white felt cutouts of piece 7 and 2 black felt cutouts of piece 8
So now you’ve got all your pieces ready, it’s time to start sewing them together. I did mine by hand because my sewing machine is busted and I get a kind of Zen buzz from sewing by hand, but if you have a non-busted one I recommend that you use it as it will be MUCH EASIER. You’re going to be sewing everything with the nice side of the fabric facing in, then turning it inside out to stuff it.
THE ARMS: (To make a quilted pattern that looks like suckers, see this other post). Pin together one patterned fabric piece 1 and one felt piece 1 (with the nice sides facing the inside). Sew down around the U-shape and back up, leaving the top open. Then turn the arm inside out, stuff it (it’s easiest to do both of these things if you sort of scrunch it up like you’re trying to put on a pair of tights, excuse the non-dude-friendly reference) and sew the top closed. Do the same for the other seven arms and rejoice in the fact that this is the most tedious part. Same deal with the two long arms, they’re just harder to stuff.
THE FINS: Pin together two of your piece 4s and sew together the curvy outer edge. Turn the piece inside out, so the seam you just sewed is on the inside, and start sewing up the other side, stuffing gradually as you go along. You should end up with a triangle-ish puffy thing. Repeat for the other two piece 4s.

THE BODY: Put down one piece 3, then place the two fins you have down with the point up and the curvy side pointing in, then make a sandwich by putting the other piece 3 down on top. Pin it all together and sew around the edges with the two fins still inside, as shown. Turn it inside out and move on to…
THE HEAD: So take piece 6 and the ten arms you’ve already done. Lay the arms, fabric side facing you, out with the arms’ top seams in a line half an inch from the top of piece 6. The order should be arm arm arm arm BIG ARM arm arm arm arm BIG ARM. The legs should be almost entirely covering piece 6. Pin them in place and sew a straight line through the individual legs seams to attach the legs to piece 6.
When you pick up the other side of piece 6, you now have something resembling a really weird untied hula skirt. Sew together the two 9-inch ends of piece 6 with the fabric side of the arms on the outside, and keep it inside out for the moment.
PUTTING IT ALL TOGETHER: Fit the open end of the body through the arms (still fabric side facing out) and pull the edge all the way through the felt cylinder so it’s even with the edge that DOESN’T have arms attached to it. Sew around the diameters of the head cylinder and the body cylinder to attach them, then pull the legs down over the head and you’re almost done!
Stuff the body, then seal it off by sewing piece 5 over the open end (even if you do have a functional sewing machine, you’ll probably have to do this part by hand).
THE EYES: Sew the black circles on the white circles and whipstitch the eyes onto the head. You do this last because you can’t tell where they’re going to end up on the end product if you put them on before stuffing the body.

-
 esermilapow reblogged this · 1 year ago
 -
 blonwh liked this · 2 years ago
 -
 toast-for-dinnah liked this · 3 years ago
 -
 bexorok liked this · 3 years ago
 -
 melaninswift liked this · 4 years ago
 -
 myarmadaisgrowing liked this · 4 years ago
 -
 glamdoll24 liked this · 4 years ago
 -
 melanique reblogged this · 4 years ago
 -
melanique liked this · 4 years ago
-
 indwells reblogged this · 5 years ago
 -
 lellium liked this · 5 years ago
 -
 detrimentalmentality liked this · 5 years ago
 -
 roctaku331 reblogged this · 5 years ago
 -
roctaku331 liked this · 5 years ago
-
 consulaaris liked this · 5 years ago
 -
 masterandcaptain liked this · 5 years ago
 -
 darkspawntaxcollectors reblogged this · 5 years ago
 -
 t-aash reblogged this · 5 years ago
 -
 allmightydepression liked this · 5 years ago
 -
 superhumanstrength liked this · 5 years ago
 -
 whenlastwespokeyoukissedme reblogged this · 5 years ago
 -
 corpselaughter liked this · 5 years ago
 -
 corpsegayarchive liked this · 5 years ago
 -
 piaracore reblogged this · 5 years ago
 -
 chrysanthemn liked this · 5 years ago
 -
 kungfujoao reblogged this · 5 years ago
 -
 ussigussi liked this · 6 years ago
 -
 lackofsocialgrace liked this · 6 years ago
 -
 theoneandonlymelonlord reblogged this · 6 years ago
 -
theoneandonlymelonlord liked this · 6 years ago
-
 flashytrashy liked this · 6 years ago
 -
 eandh99 liked this · 6 years ago
 -
 intototaloblivion reblogged this · 6 years ago
 -
 afromizrahim liked this · 6 years ago
 -
 othersideofprobably liked this · 6 years ago
 -
 smallsaltyfrog reblogged this · 6 years ago
 -
 pmaxshay reblogged this · 6 years ago
 -
 possum-princee reblogged this · 6 years ago
 -
possum-princee liked this · 6 years ago
-
 just-stay-determined liked this · 6 years ago
 -
 rupeeslippers reblogged this · 6 years ago
