I Have Recently Received Another Ask About My Canvas Pulling And Since I've Been Thinking About Making
I have recently received another ask about my canvas pulling and since I've been thinking about making a serious tutorial for a while now, I took the opportunity to take some pics and vids while finishing the tree. Do please enjoy :3
1. Why pulling out canvas at all?
Primarily, this is a fantastic technique to apply cross stitch patterns directly to the item you want OR to make patches from old jeans, like this one:

With small patterns I usually don't bother to sew the canvas prior to embroidering, like with the pupper above. In case of the bigger patterns, I usually sew it lightly on the edges just to keep the canvas in one place. The more stretchy the material type is, the more important it's going to be to keep it in place.
2. Why not use a soluble canvas?
I'm sure you can and that they'll be as successful as the regular one 😁 However, as I mentioned in my previous posts here and here, I prefer to err on the side of cheaper, hence the tutorial.
3. Okay. I'm convinced - I even have a pattern embroidered on! What's next?
With small patterns (like the doggo earlier) it's going to be pretty easy. You just pull the threads one by one - preferably starting on the thinnest part of the pattern - and you may not even need the pliers. The fun (?) is with the large pieces, because the canvas has on average quite fragile threads and they like to break. Note - the canvas I'm using and I suppose most of the existing canvas types, will have four threads per one embroidery row. It's usually easier to pull one first and then the other three, bit that may vary when, for example, you managed to pierce the thread during stitching phase earlier 😉
If you were already careful during the stitching, you paid extra attention to embroider EXACTLY between the canvas threads and avoid piercing them at all. There are two benefits to that being extra careful: one, it's easier to pull it out later; two, the stitching gains an extra precision to it (and it looks great!). I recently discover that the round tip needle is making it much easier and if you're interested, there's a separate post about it as well!
On to the process! You can see from the pictures how I started with cutting out a piece of canvas that I can later reuse for something small (recycling is my hobby 🤷🏻♀️). I also pulled loose threads from around the tree:

Next part was to clean up the trunk and the grass on the right:

I then cut off the excess to avoid the threads tangling and slowly moved to the sides of the leaves on right and left:


You'll notice that the last photo has the thread pulled halfway through the pattern. That's because on this stage it's usually impossible to simply pull the thread out - even with the pliers it is just going to break off. I use a needle to pluck it from between the embroidery like this:

If you're more of the visual learner, I made this vid that I hope explains the process in more detail. You'll notice that I'm using my fingers and not the pliers here, because it's faster than to switch between tools.
And finally, when you're left with single direction threads like these, it's just a matter of pulling them out one by one.

And that's it! The final product looks clean and neat, AND you will notice that without the canvas beneath it's also getting a bit of volume that looks cool (and helps even out small mistakes you may have made along the way).


Thanks for reading this far! Let me know if there's something else I forgot to explain 😊
More Posts from Lokisbur and Others
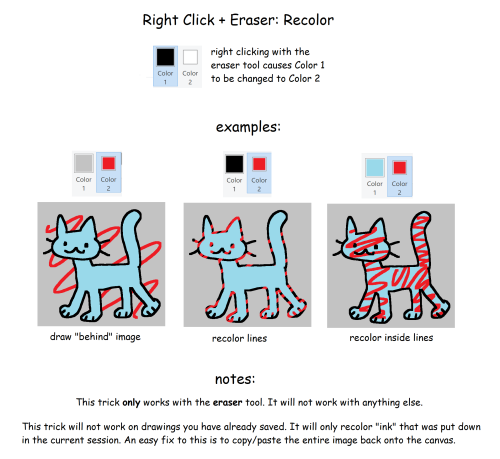


Made this because my other “ms paint tips” post is going around, but the images in it were only made as supplemental material for a paper i had to write and dont include all the necessary information on how the tricks work. As a result people are getting very confused when they try them out to unfavorable results. I hope all those people find this post and their confusion can be cleared up.
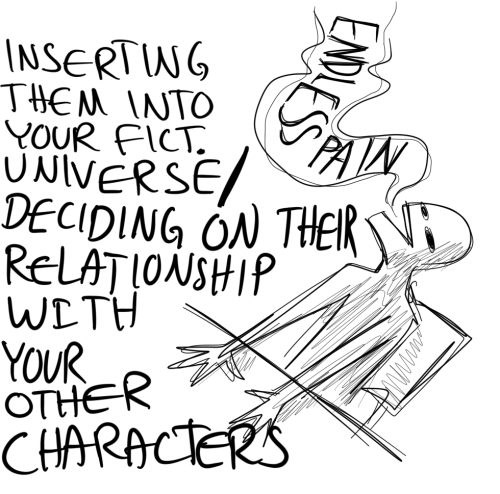
the suffering never ends
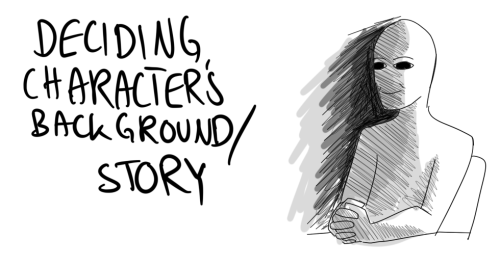
trying to get your story together like:

writer’s block (dry) = no desire to write, no ability to write (bearable)
writer’s block (wet) = HUGE desire to write, no ability to write (very evil)
Don’t Add Fanfiction To Your Goodreads Shelf
Hi folks, I know some of you like to use Goodreads to track all your reading and don’t want to distinguish between books and fanfiction.
I am, however, begging you not to do this. It is extremely jarring and disconcerting to be a fic author and find your works somewhere in the wild where you did not personally put them. Fics are not books, are not published in the same way as books, and exist in a precarious legal space.
Please don’t attempt to elide the separation that exists between fandom and the world of official publishing.


Cute little shoulder bags as a gift for my sibling’s girlfriend and her sister! My sibling is visiting them for the summer and we wanted to send gifts. These turned out SO cute, I think I’m going to need to make one for myself :D
Pattern: Orange squares and strawberry squares are from Raffamusa design’s Tutti Frutti Granny Square series, while the flower squares are the ‘Dainty Daisy Granny Square’ by Just Be Crafty. The shape and the top half were taken from the ‘Super Easy DIY Crochet Bag’ by August Craft & Crochet!
Yarn: The only one I know is that the green base from the orange granny squares is Debbie Bliss eco in shade 32603. The others are a hodge-podge of DK I already had (potentially Stylecraft Special leftover from a temperature scarf, at least for the oranges), and unlabelled stuff bought from the donation section of my local craft store! I was able to find some cotton yarns with more structure, which was great for the bags!
Label: My lovely new buttons are from VikingLaser on Etsy, who was wonderfully communicative and prompt. The buttons are super cute and good quality - I’d recommend if you’re looking for handmade buttons like this!
So I finished my embroidery and,,,,

Why is it so ugly??? I SPENT HOURS ON THAT FOZBFIDJUF END ME
Very productive day, I remade my stamp for 2023!!!

Neon pondering his Subatomic Supern(orb)va
-
 epke reblogged this · 2 weeks ago
 -
 hhodophilax liked this · 3 weeks ago
 -
 midnight-aura-star reblogged this · 3 weeks ago
 -
midnight-aura-star liked this · 3 weeks ago
-
 grublovescorn liked this · 3 weeks ago
 -
 trans-elrond liked this · 4 weeks ago
 -
 elakera liked this · 4 weeks ago
 -
 xsunbirdx liked this · 4 weeks ago
 -
 flightsoffancyonpaperwings liked this · 4 weeks ago
 -
 garet-the-3rd liked this · 1 month ago
 -
 nephelai-learns-things reblogged this · 1 month ago
 -
 sounds-of-my-silence liked this · 1 month ago
 -
 dreamytears liked this · 1 month ago
 -
 ri-sol liked this · 1 month ago
 -
 scruffinator liked this · 1 month ago
 -
 grapefruitandgasoline reblogged this · 1 month ago
 -
grapefruitandgasoline liked this · 1 month ago
-
 zyxys1 liked this · 1 month ago
 -
 kabolac liked this · 1 month ago
 -
 cynthiamor liked this · 1 month ago
 -
 a-bundle-of-sticks reblogged this · 1 month ago
 -
a-bundle-of-sticks liked this · 1 month ago
-
 spaceahoy liked this · 1 month ago
 -
 emcant liked this · 1 month ago
 -
 trekkette liked this · 1 month ago
 -
 umberellars reblogged this · 1 month ago
 -
 darthmelyanna reblogged this · 1 month ago
 -
 lokisbur reblogged this · 1 month ago
 -
 nat-tea-n-coffee liked this · 1 month ago
 -
 starbunnis liked this · 1 month ago
 -
 rottenfruit6 liked this · 1 month ago
 -
 that-queer-fool liked this · 1 month ago
 -
 haftsignierfahne liked this · 1 month ago
 -
 crystalrose141 liked this · 1 month ago
 -
 a-a-lost-munchkin liked this · 1 month ago
 -
 knittyknoddy reblogged this · 1 month ago
 -
 thosepoorsoulswhodwellinnight reblogged this · 1 month ago
 -
 clara666cherrybomb reblogged this · 1 month ago
 -
 immafuckingfool liked this · 2 months ago
 -
 nightside-of-siberia reblogged this · 2 months ago
 -
 lovelystargazer09 liked this · 2 months ago
 -
 super-homeless-richard-fast liked this · 2 months ago
 -
 artist-owl liked this · 2 months ago
 -
 redwineanddnicotine liked this · 2 months ago
 -
 zornofzorna-blog liked this · 2 months ago
 -
 hatchiio reblogged this · 2 months ago

xey/xem French Don't be fooled, I'm a platypus, I don't much stuff (art side account)
288 posts