Mood Board For A Taurus Who Loves Trees 🌲 And Cats 🐱


Mood board for a Taurus who loves trees 🌲 and cats 🐱
-Astro
More Posts from Daisy-zam and Others

I think anyone just moving out wants this aesthetic
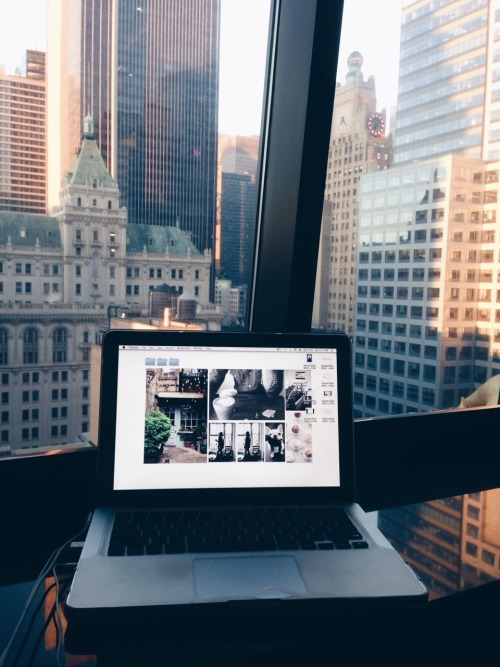
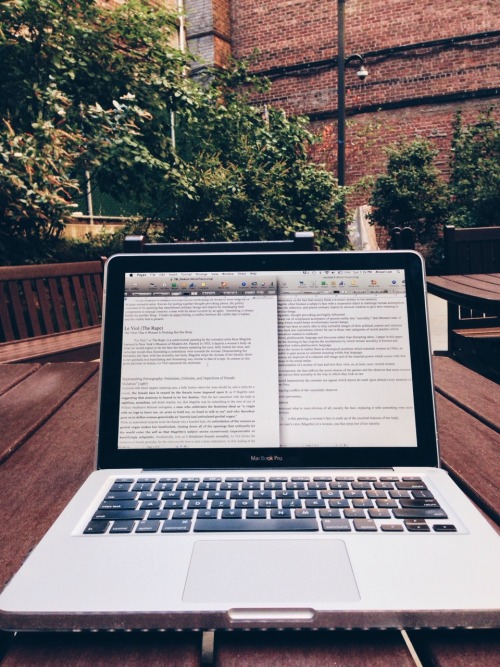
New York workspaces

mini florals, adapted from client designs. would love to do more stuff like this!
Yes this is so me. 😂

*Me during school*


New on Emma Studies Etsy Shop!
These are a couple of things I’ve added to my shop over the last few days! I have linked them all below:
2018 monthly desktop calendar pack
productivity time manager printable pack
post-it note landscape planner plan
finance organiser bundle
weekly task planner printable
weekly overview planner printable
Use ‘student10’ for 10% discount on any purchase - no minimum spend :-) xx

Even though they arent necessary I use at least one of these during my study sessions
Some Unnecessary Study Necessities
A Good Place To Work:
1. Starbucks. The smell of coffee and the quiet chatter make it very peaceful while working. It provides some nice white noise and you can get coffee and tea. Perfect.
2. The library. Known for being quiet which can help with focusing. They also usually have printers and you’re surrounded by books for researching if need be.
3. My backyard. Not my backyard specifically, but sitting in the fresh air while doing homework can be relaxing. If you have outdoor tables/furniture, even better!
4. A friends house. Be careful though. A friend can either help you focus and you can work together, or they can be your biggest distraction.
5. My living room. You don’t have to leave the house the change your study space. Just sit at your dining table or couch and get out of your room for a bit.
Snacks:
1. Fresh fruit. My personal favorites are apple slices, grapes, raspberries or cherries. They’re mess free, and good for you.
2. Nuts. I love cashews. They’re super easy. You can even find them it small, individual packages to throw in your bag if you’re leaving the house.
3. Popcorn. Just plain ol salted popcorn. Mmm
Noises:
1. White noise. My go to. you can find playlists of white noise on Youtube, Spotify, or Pandora stations. There’s also an app called Tide which acts as a Pomodoro timer with white noise in the background.
2. Piano. I listen to the Piano in the Background or the Piano Bar playlists on Spotify because there’s no words to distract me.
3. Movie soundtracks. I like the ones from superhero movies because they put me in a kickass mood.
Of course you don’t really need snacks or background noise or whatever but it can make studying a bit more enjoyable. Just do what you need to do to get stuff done.

Hey, there! Someone recently asked me, “How do you make a moodboard?” It’s a tough question to answer, actually, because I wasn’t sure if the person meant conceptually (the process of conceiving one) or technically (the process of putting it together on a computer). So, I thought I’d make a masterpost covering both, as well as some tips on aesthetics.
Step 1: Conceiving of your moodboard
Sometimes people will make requests, and half the work will be done for you. They’ll request “Hufflepuff, doodles, tea, INFP, Virgo, travel” and you’ll know that these are themes/motifs/images that you should try to include. Alternately, you may have a more general feeling that you are trying to evoke through images: melancholy, for example. You may also have a specific aesthetic that you’re trying to achieve. ~Aesthetic~ is a tricky word and can mean several different things in varying contexts. “Brooding sad girl lyfe” could be an aesthetic, a cohesive visual goal. In this case, all the components of the moodboard would be contributing to this notion of a brooding sad girl and her lyfe.
Step 2: Finding pictures
Once you have an idea of where you want to go with your moodboard, it’s time to hunt for images! I like to surf the tags on Tumblr, and if I can’t find something that suits my needs there, I’ll turn to Google images. Remember to keep track of where you find your pics so you can give credit later (or even better: ask permission to use them).
Step 3: Making the thing
You can compose a moodboard by simply uploading photos to Tumblr and moving them around, or you could use graphic design software. I like to use Canva because it’s easy and free. It also allows you to save the moodboard as a single image. I’ll briefly go through making a moodboard with Canva.
First choose a size by clicking “Use Custom Dimensions”: 900 x 900 pixels is standard for square moodboards. You can also set the size using inches instead of pixels.

Then you choose a layout from the lefthand menu.

Next, load your pictures by clicking “Upload” in the lefthand menu. Once they’re uploaded, you can begin dragging them over to the cells. Double clicking a picture allows you to adjust its positioning in the cell.

When positioning the photos, I always like to keep in mind balance: of light and dark, of colors, of subject matter. I wouldn’t want two pictures of teacups next to each other. I wouldn’t want two pictures of text next to each other either. Balance is key. Glancing over it quickly, you should get a sense of a flow of images, with nothing too jarring or standing out. This will make for a cohesive moodboard.

My personal style is a little busier than most, meaning the images are more crowded and cramped. I find this gives the moodboard more texture and makes it more visually interesting. This is just my opinion. I still find minimal moodboards to be beautiful, too.
Step 4: Posting the thing
Always give credit where and when you can. And the more credit you give the better: if you know the photographer’s name–awesome! If not, then the blog where you found it should suffice. Some people believe you should ask permission before posting a photo to a moodboard, but often this won’t work in the interest of time. It’s actually a little bit of a controversial subject; many people practice crediting in different ways. This is just my suggestion. I also usually offer to take down a photo if the owner objects. I used all my own images for this masterpost and blurred out others to save myself the trouble :) You really should credit the owners, though.
I hope this was helpful. Message me with any questions or feel free to add on!
Houses During the Fall
Gryffindor: climbing trees, jumping into piles of leaves, getting lost in corn mazes, face painting, building pillow forts, ripped jeans and combat boots, laughing loudly, rolling down hills, walking barefoot on cold floors, a mischievous glint in someone’s eye, roasted marshmallows
Ravenclaw: bedheads and fuzzy socks, pumpkin flavored coffee, reading by the fire, passing out on soft pillows and warm blankets, listening to rain, old music playing on a turntable, deep conversations, crunching leaves, foreheads against cold windows
Hufflepuff: bonfires and camping with close friends, big sweaters and fluffy scarves, drinking loads of hot cocoa, pumpkin carving, warm hugs, morning walks, smiling at strangers, holding hands, blue lips and pink noses, huddling close to friends, holding a warm drink, cuddling
Slytherin: watching old movies wrapped in a fluffy blanket, hot tea on cloudy days, pink cheeks from cold wind, knitted beanies and cozy jackets, stargazing on a rooftop, long sighs, flickering candles, misty mornings, reading old poetry, writing in a cafe, tired yawns

-
 puresagee reblogged this · 1 year ago
 -
puresagee liked this · 1 year ago
-
 babe-the-adventurer reblogged this · 3 years ago
 -
 i-llbeokay liked this · 4 years ago
 -
 paramist liked this · 4 years ago
 -
 xnajs liked this · 4 years ago
 -
 boryaquantum liked this · 4 years ago
 -
 nemophilist-wake liked this · 4 years ago
 -
 sireneau liked this · 4 years ago
 -
 sh0rus liked this · 4 years ago
 -
 3scapes liked this · 4 years ago
 -
 lunareclips4 liked this · 4 years ago
 -
 tenaciouscoplightturtle liked this · 4 years ago
 -
 glutenfriuggla reblogged this · 4 years ago
 -
glutenfriuggla liked this · 4 years ago
-
 notsocleverbot liked this · 5 years ago
 -
 glennfsv liked this · 5 years ago
 -
 lizard-queen-izzy reblogged this · 5 years ago
 -
lizard-queen-izzy liked this · 5 years ago
-
bonnerhn liked this · 5 years ago
-
 whoreofbabylon00 reblogged this · 5 years ago
 -
 grungypanda liked this · 5 years ago
 -
 mental-mess-x liked this · 5 years ago
 -
 the-overbear liked this · 5 years ago
 -
 lovemeloosely liked this · 5 years ago
 -
 cherrypvp liked this · 5 years ago
 -
 db4241984 liked this · 5 years ago