Make Some Pocket Extenders For Your Pants
Make Some Pocket Extenders for Your Pants
So I don’t know about you, but I’m often frustrated by the ridiculous smallness of girls’ pockets. At a bare minimum, I need to be able to shove my cellphone in there - come on, pants companies! So what I started doing was making myself pocket extenders. I’ve done this several times, for pants and shorts. It’s great.
I just got this pair of jeans, so I thought I’d show you how to do it. I kind of feel like it just hasn’t occurred to some of you that this is an option, so maybe now it will. All you need is your pants, some fabric (I just took a random piece from a scrap bin), a needle, and some thread (thread doesn’t even need to match the fabric since literally no one will see it).

See? Ridiculous. Like, half a cellphone, or only 2.5″. Useless.

So turn those inside out to expose the pockets.


Figure out how big you want your pockets to actually be. I kinda go by whatever looks like might be right. I didn’t really measure them. Fold the fabric in half, so you have a pocket, and then fold it in half again so you can have two equal ones.

Try to get the edges to line up enough, pin it in place, then sew up the sides! Are your stitches crazy uneven and wonky looking? Doesn’t matter; nobody’s going to see it. These are in the inside of your pants. The only thing that matters is that it holds up. So I double-did the corners, since those tend to get the most stress.

Cut open the bottom of the existing pockets.

Pin it in place, then sew around, joining the new pocket to the old pocket. I did this by keeping my hand on the inside, so I wouldn’t accidentally sew through the other side. Again, I reinforced the corners, and didn’t worry about what it actually looks like. Then I turned it in side out to make sure the inside was all joined properly.

Yay all done! And the pockets are so much bigger now!

Whaaaat I can fit my entire phone and entire hand and probably something else now, are girls’ pockets even allowed to do that?! Heck yeah they are.
More Posts from Anavsky and Others

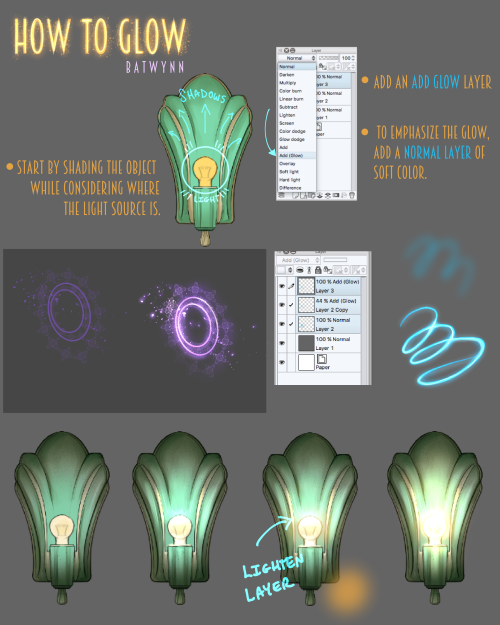
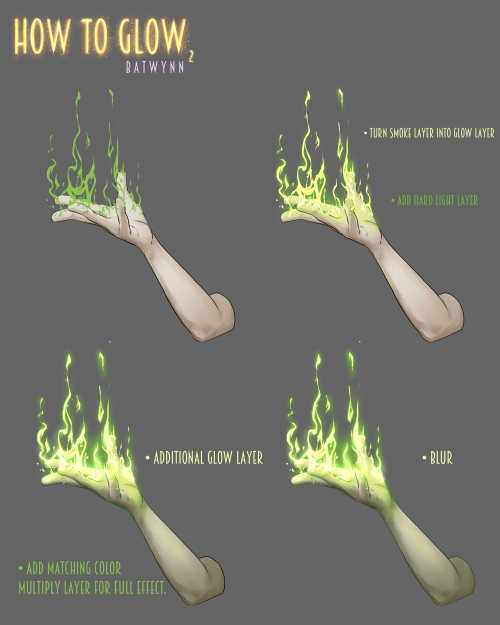
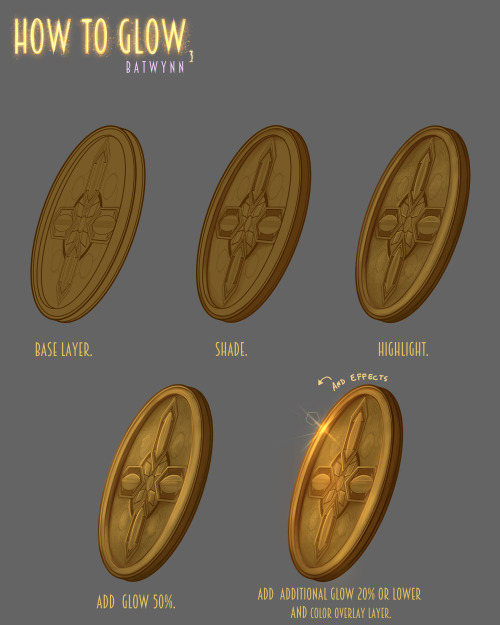
MidnightPanther asked for a texture tutorial on the Firealpaca group on Deviantart, so here’s one I put together in 10 minutes (sorry if it looks a little crappy). Deviantart doesn’t let me post a tutorial as .gif, so I can’t xpost :( I hope this is useful! *goes back to drawing Color swatch meme*

Inktober day 9: Dipper Pines insp: littledigits.tumblr #inktober #inktober2016 #drawing #showyourwork #traditionalart #art #gravityfalls #gravityfallsart #disneyart #dipperpines #dipperpinesart

Gotta a little time, little time to get things over 🎵🎶 #wip #poisonivy #sketch #sketchbookpro #drawing #fanart #characterdesign #conceptart

More Gifs and photos that I illustrated with little animations =)
Always fun to make ^^ !
Allons-y means let’s go :D
Found some titles to the animations :
“Say hi”
“Funny desert”
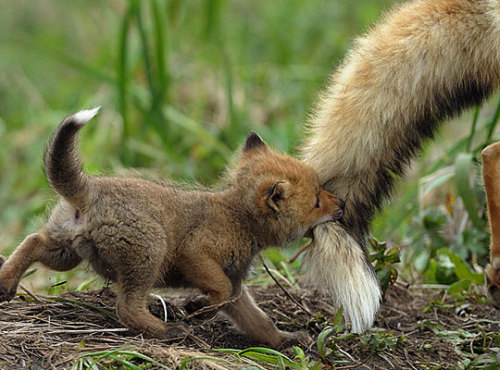
“Bread radars are everywhere ! ” (Bread : I told you !!) (Fox : QxQ”)
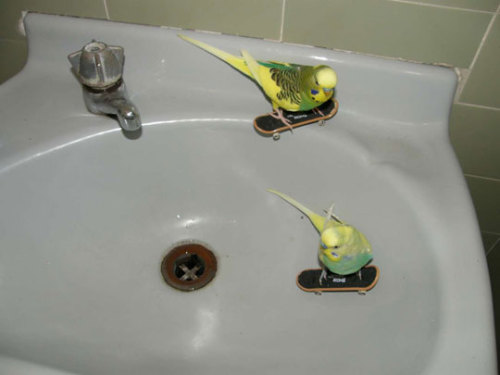
“Tony Parrot pro skater”
“Let’s go !”
I hope you will enjoy these ^^ the illustrations are on my facebook page as well =)
I’m really thinking of making a little story about all of my characters, like a mini cartoon. It could be fun =)
would love to see ninja turtle pixels!
Did the first part before! Maybe I will continue the second part ?


Late night sketch: Hufflepuff Steven Universe

I’m pretty sure this is what my daughter sees when she looks in the mirror.


Simple brush tutorial by catnappe143 for Paint Tool Sai.
This is a similar process to how I do grass in Photoshop.
http://catnappe143.deviantart.com/art/Bush-tutorial-363593214
-
 eternalparadisearchive reblogged this · 2 weeks ago
 -
 sushi-mama reblogged this · 3 weeks ago
 -
sushi-mama liked this · 3 weeks ago
-
 the-queen-of-pastels reblogged this · 1 month ago
 -
 sheriffmanman reblogged this · 1 month ago
 -
sheriffmanman liked this · 1 month ago
-
 redvolpe liked this · 1 month ago
 -
 sirzenithknight9 reblogged this · 1 month ago
 -
 luxaii liked this · 1 month ago
 -
 alchi-andrakas liked this · 1 month ago
 -
 sometimes-a-writer reblogged this · 1 month ago
 -
 wispwick liked this · 3 months ago
 -
 masterpost-collections reblogged this · 3 months ago
 -
 eclectichellmouth reblogged this · 3 months ago
 -
 secretneongenesis reblogged this · 3 months ago
 -
 inquirenorth reblogged this · 4 months ago
 -
 tumbloggingattheendofitall liked this · 4 months ago
 -
 abschaffer2 liked this · 4 months ago
 -
 sunbeamwolf-kissed reblogged this · 4 months ago
 -
sunbeamwolf-kissed liked this · 4 months ago
-
 cocoamoonmalfoy reblogged this · 4 months ago
 -
 rikomoriyama01 liked this · 4 months ago
 -
 clawfootcoffin liked this · 4 months ago
 -
 floopthecooper liked this · 4 months ago
 -
 aeshnacyanea2000 reblogged this · 4 months ago
 -
 allyofathens liked this · 4 months ago
 -
 echo-of-an-empty-stage reblogged this · 4 months ago
 -
echo-of-an-empty-stage liked this · 4 months ago
-
 caseyjonesisinthehouse reblogged this · 4 months ago
 -
 argle-bargling liked this · 4 months ago
 -
 sergeantowl reblogged this · 4 months ago
 -
 coranon reblogged this · 4 months ago
 -
coranon liked this · 4 months ago
-
 lavender-linens reblogged this · 4 months ago
 -
 roseverdict reblogged this · 4 months ago
 -
 jazzhaaaands reblogged this · 4 months ago
 -
 paskariu liked this · 5 months ago
 -
 fae-linkx liked this · 5 months ago
 -
 groaninggranada liked this · 5 months ago
 -
 sofia-jones reblogged this · 5 months ago
 -
 vnc5tc reblogged this · 5 months ago
 -
 requiemforawitchking liked this · 5 months ago
 -
 chthonicmoth liked this · 5 months ago
 -
 tiny-womfn reblogged this · 6 months ago
 -
 hummingbird-notes reblogged this · 6 months ago
 -
 waterloggedgarden reblogged this · 6 months ago
 -
 nerenda reblogged this · 6 months ago
 -
nerenda liked this · 6 months ago
Personal blog where I share art tutorials I find on this website and occasionally, maybe, something I might do.
132 posts